Gelatin Monoprinting
I was the "presenter" at the October meeting of my mixed media group in Portland. [Each month, a member "presents" (teaches/shares) the workshop, which lasts about 4-6 hours.] My topic was gelatin monoprinting.
The night before the meeting, each person made a gelatin printing plate, made from plain gelatin and water. I doubled my batch, using two boxes of Knox plain gelatin (4 envelopes each) and 2 cups of hot water. After refrigerating overnight, I had a nice thick rectangle of gelatin, about 9" x 11".
Some people leave their gelatin plate in its pan, but I take mine out for printing. It begins to develop cracks and other interesting lines and marks without the confines of the pan holding it together.
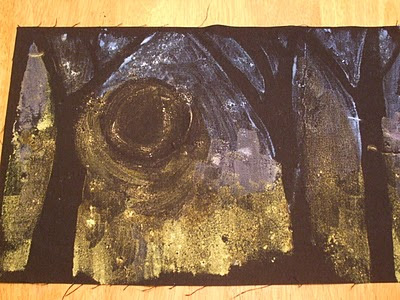
The next step is to paint on the gelatin, then use strips of newspaper to create a design. The paper strips act as a resist, so the areas they cover won't be printed. I was thinking about one of our family's favorite children's books called "Barn Dance," and I painted a low, full moon illuminating a grassy orchard. Here's my first print on watercolor paper:
 |
| Note the stick-straight lines in the trees, made by using torn strips of newspaper. |
[Click on any image to choose another size to view.]
Before pulling any more prints, I misted the gelatin plate with water and wiped off the remaining paint with a paper towel. I repainted the scene, but drew the trees with my fingers this time (instead of using strips of paper), removing paint like this:
and here were the resulting prints:
 |
| First print on white PFD (prepared for dyeing) fabric |
 |
2nd print made from same gelatin plate, after adding more paint to that still remaining on the gelatin.
(I love Jacquard's Lumiere paints! That's what I used to get the luminosity in the blues and greens.) |
By now, the gelatin plate was getting these interesting cracks and crevices, which give texture and character to the prints I was making. The plate would last a lot longer, but was taking up too much refrigerator space. So I went all out, covering the plate with paint as I composed this desert-in-spring scene:
 | | |
| Note the large crack about 1/3 from left side, and the pockmarks on the green foreground. | | | | | | | | | | | | | | | | | | | | | | | | | | | | | | | |
|
|
|
|
|
|
|
 |
| While it's not my favorite print, this ones does have some interesting sections. I like the brush marks in the blue sky, and those in the lower left corner. The colorful dots will become flowers. Threadsketching and quilting might bring it to life! |
This was my third experience with gelatin monoprinting, and the best so far. I learned much more this time; it's a fun & exciting process and is very forgiving. I can't wait to try it again! But first, I want to quilt these pieces, which I'll show when they're done.


