Thursday, August 30, 2012

My 100th post; not quilt-related

I've been trying to find a way to link this post's topic to quilting, but I give up.  It's not related to quilting, but since it's something different than the usual, I deemed it blog-worthy.  It also happens to be my 100th post!

I spent last Fri. night with my daughter in Portland.   Her neighborhood was hoppin' with excitement (even though there was no street parking within a 4 block radius) because they were filming an episode of the TV show GRIMM at Zell's Cafe, on the corner of SE Morrison & 14th.

Zell's Cafe
 
Note on Zell's window
Equipment being delivered
Lighting on crane
We didn't see any of the show's stars, but since I've only seen it twice, I wouldn't recognize them anyway.  I couldn't believe how many people, trucks, semis, tools, equipment, electrical stuff, etc. were required!   

We hung around outside til midnight.  Talked to lots of different crew members and some of the extras -- all were VERY nice and friendly.  In fact 80-85% of the people who work on that show live in Portland; only a few come up from L.A.  Also learned that this one little TV show requires:
10 months of filming -- 5 days a week -- 12-16 hrs. per day


We each bought a T-shirt and here's what's on the back (note the Sasquatch on Mt. Hood!):
Back of T-shirt
Close to midnight, the director (I think) told us we could stay where we were standing while they filmed, as long as we didn't look in the direction of the camera.  Two of the extras who'd just finished their shots stood nearby, talking to a crew member. The director told them the same thing, so we may show up as background figures in one of the shots!
The directors' chairs


Monday, August 27, 2012

Sunsets and Screenprinting

One thing I love about Oregon's Willamette Valley is the sunsets.  It was partly cloudy today, which makes for a more interesting sky when the sun begins its evening descent.

Tonight's sunset.
 . . . and a few minutes later.
 Yesterday I did some deconstructed screenprinting.  First, I removed the items I'd embedded in the thick, wet thickened Procion dye on the back of a silkscreen, after making sure the dye was very dry.  Then I mixed up some print paste (urea, sodium alginate, water) and let it thicken.  The screen was placed on top of  my soda-soaked fabric, and print paste was spooned into the "well" at the (inside) top of the screen.  A squeegee was used to pull the print paste across the screen, which releases the dried dye on the back and prints the image.
Ready to pull the next print onto fabric.
Ink remaining on screen after deconstructed screenprinting.
The mess in my kitchen nook (AKA my printmaking studio!)
Wet prints on fabric, ready for batching.
 Today I rinsed the batched fabrics, then wash, dried, and ironed them.  I got a few nice surprises (always the best part), as well as a few duds.
Series of prints from one screen.
Detail shot of print from another screen.


When I finished working with the screens last night, I did a little dye-painting (painting with thickened dyes).  Since the next Fiberexplorations challenge is LETTERS, I played with writing, using a narrow paintbrush and for the very thin lines, a curved plastic syringe from the veterinarian's office.
Detail of dye-painted piece.

Sunday, August 19, 2012

A summer Sunday afternoon

How do you decide what to do with hours and hours of free time on a beautiful summer Sunday afternoon?   There's an art fair in nearby Silverton, a small town nestled in the western foothills of the Cascades.  But since I want the day to be both enjoyable and productive, I've narrowed down my choices:
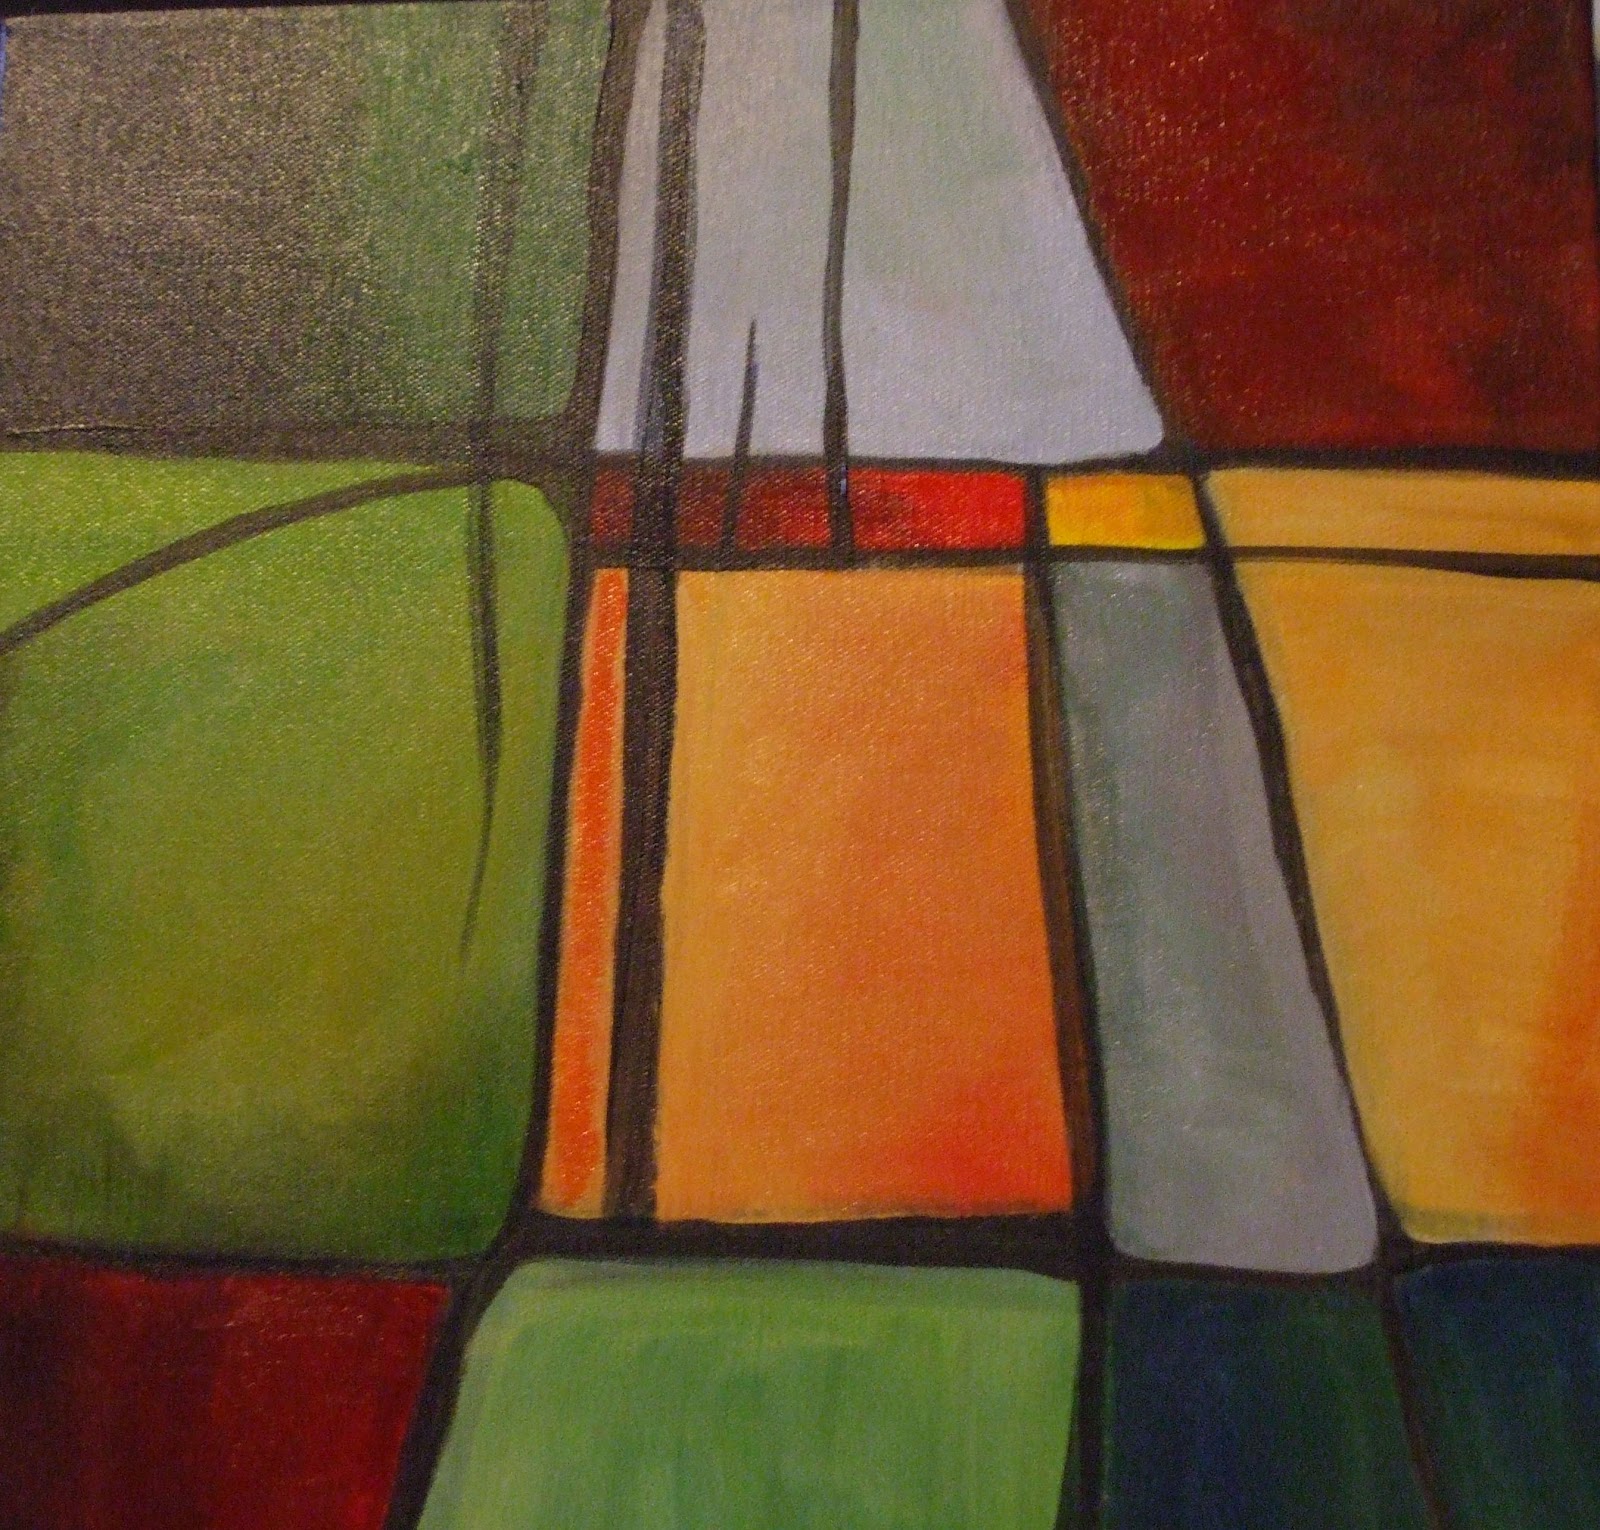
1.  Sewing: Continue work on the small piece I started last week, which is a fabric interpretation of an abstract painting by Katy Vigeland.  Katy's a friend from the other group I'm in, the Salem Art Group (SAG).  I instantly fell in love with these two abstract paintings that she brought to a meeting last fall:

Abstract painting by Katy Vigeland.
Another of Katy's abstract paintings.


This is the first of Katy's paintings I chose to interpret in fabric.
The start of my interpretation of her first painting above.

Some of the other fabrics to be fit into place and stitched.
 2.  Dyeing: A great option for a warm (but not too hot) sunny day!  I mixed up a flour-paste resist and scraped it across this white fabric (taped down to a foamcore board covered with clear Contac paper).  While it was still wet, I scratched some wavy lines into it with an "Afro pick" comb, then used a bamboo skewer to draw other shapes and doodles, plus a bit of writing.
(Dried) flour-paste resist on white PFD fabric

Words and textures scratched into the surface.

A bit more doodling.


My next step is to remove the tape and scrunch up the fabric to make the dried flour-paste crinkle and crack.  Then mix up the dye solutions and apply.  The dye will only penetrate where the fabric is exposed (through the scratches and cracks).  It's always exciting to see the surprises that result from using resists!

I'll also add some thickener to some dye colors for deconstructed screenprinting.  After the thickened dyes are dribbled down the back of the screen,  textured objects are embedded into it and left to dry.  More on the process (and my results) in the next post.

3.  Find new design inspiration:  I played around with some watercolors last week with the goal of then using two L-shaped cropping corners to find what Katie Pasquini Masopust calls "the heart of the image," an area that can be used as the design basis for an art quilt.  (This is just one of the great ideas I've rediscovered while looking through Katie's book Design Explorations for the Creative Quilter.)

My first page of watercolor play -- not very interesting.
My second effort was more exuberant and probably has some areas of interest.
I choose dyeing!  I'll post my results later.

Wednesday, July 25, 2012

Special Exhibit, 2012 Sisters Outdoor Quilt Show

The Sisters Outdoor Quilt Show 2012 . . . the largest 
outdoor quilt show in the world.

Photos of our Fiberexplorations' Fabric Swatch Challenge Special Exhibit:

Crowds gather for an up-close look at our quilts.
by Maureen Erhardt
by Joanna Price
by Erika Close
by Lisa Encabo
by Kathleen Nesvik
by Torrie Gordon


by Chris Deibel
Leaf detail:  hand applique, white cotton velvet, threadpainting


by Deb Sorem
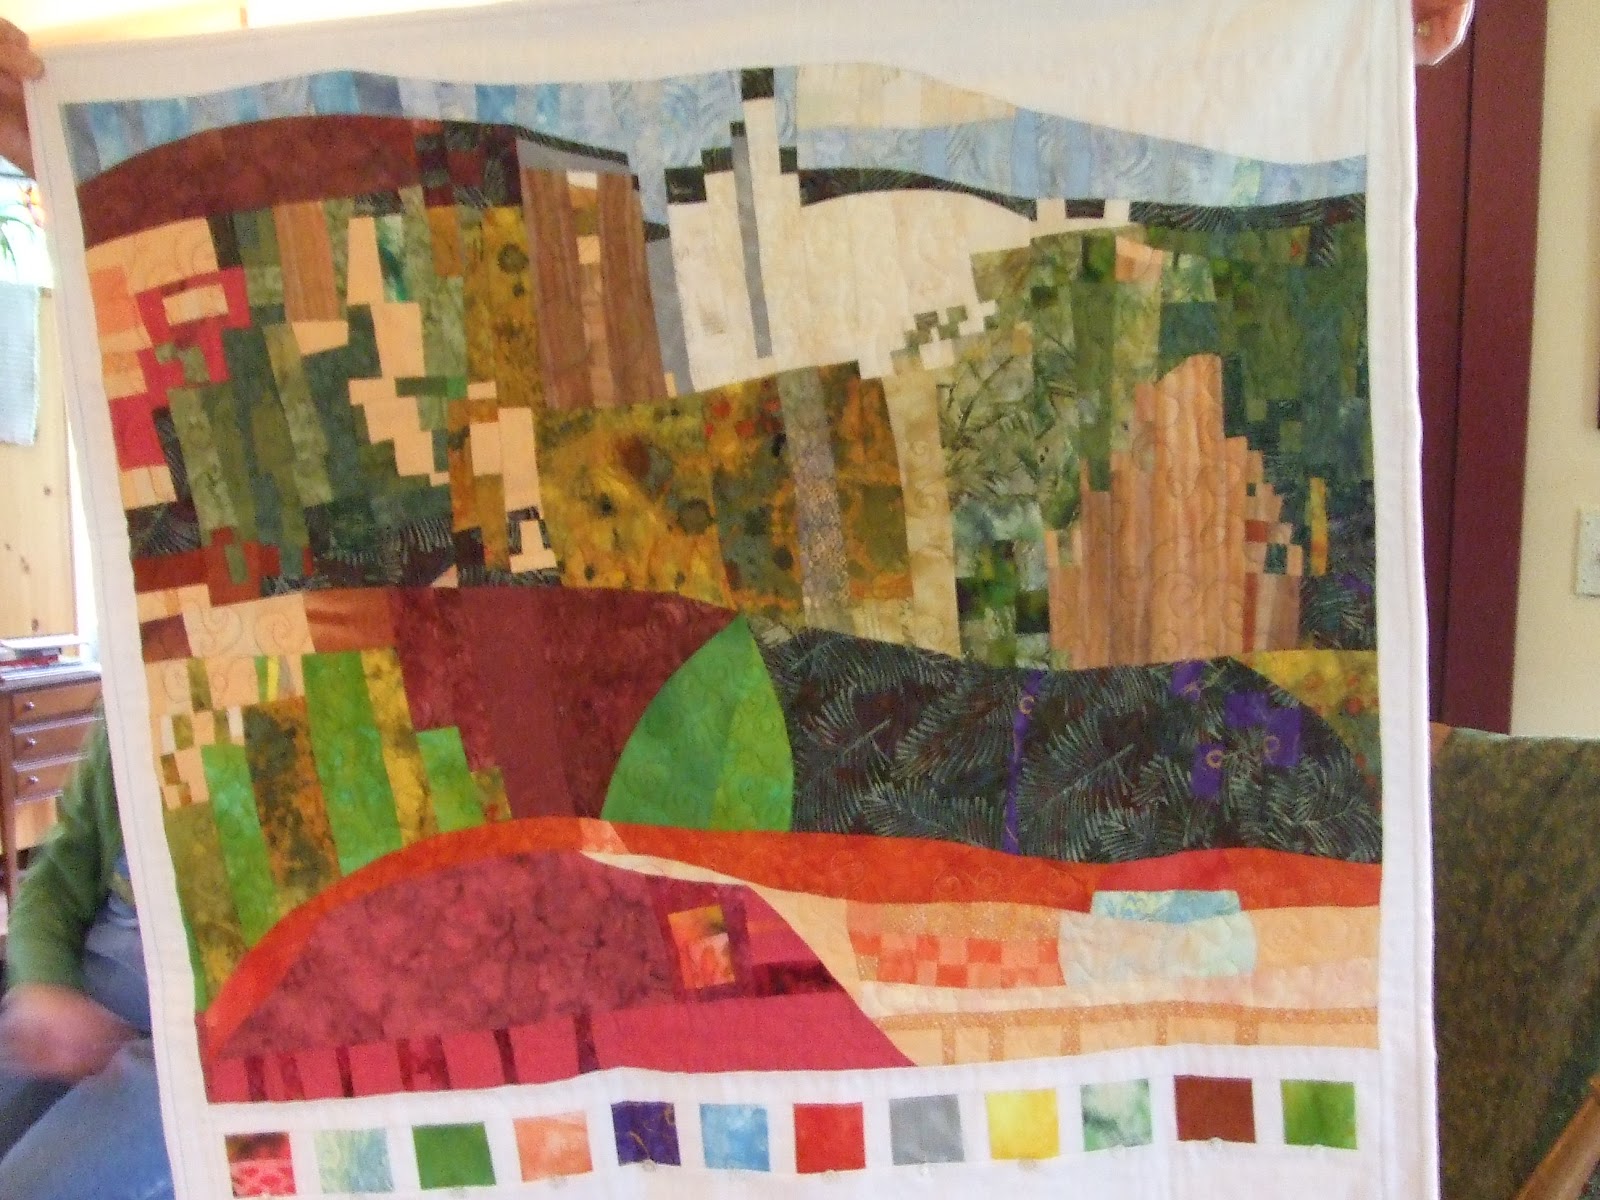
Kathleen amazed us all with her beautifully-executed confetti-style landscape.  Can you believe she's only been sewing for a year or two?  In this piece, it's obvious that she has a background in art, but it also gave her more confidence in her sewing skills -- she said she finally "became friends with her BSR" (Bernina Stitch Regulator).  No wonder Kathleen's smiling like a proud parent; she's definitely earned it!
Kathleen and her masterpiece!
[Thanks to Lisa Encabo for the above photos.]

For the first time in its 37-year history, the show had to close "significantly early" (2:30 pm) because of an approaching thunderstorm.  As soon as the call was made, visitors rushed to help the quilt show volunteers with taking down 1,400 quilts.

Thunder in the distance . . . down came our quilts!

10 min. later . . . torrential rain, and no quilts in sight.

The Three Sisters, after the storm.
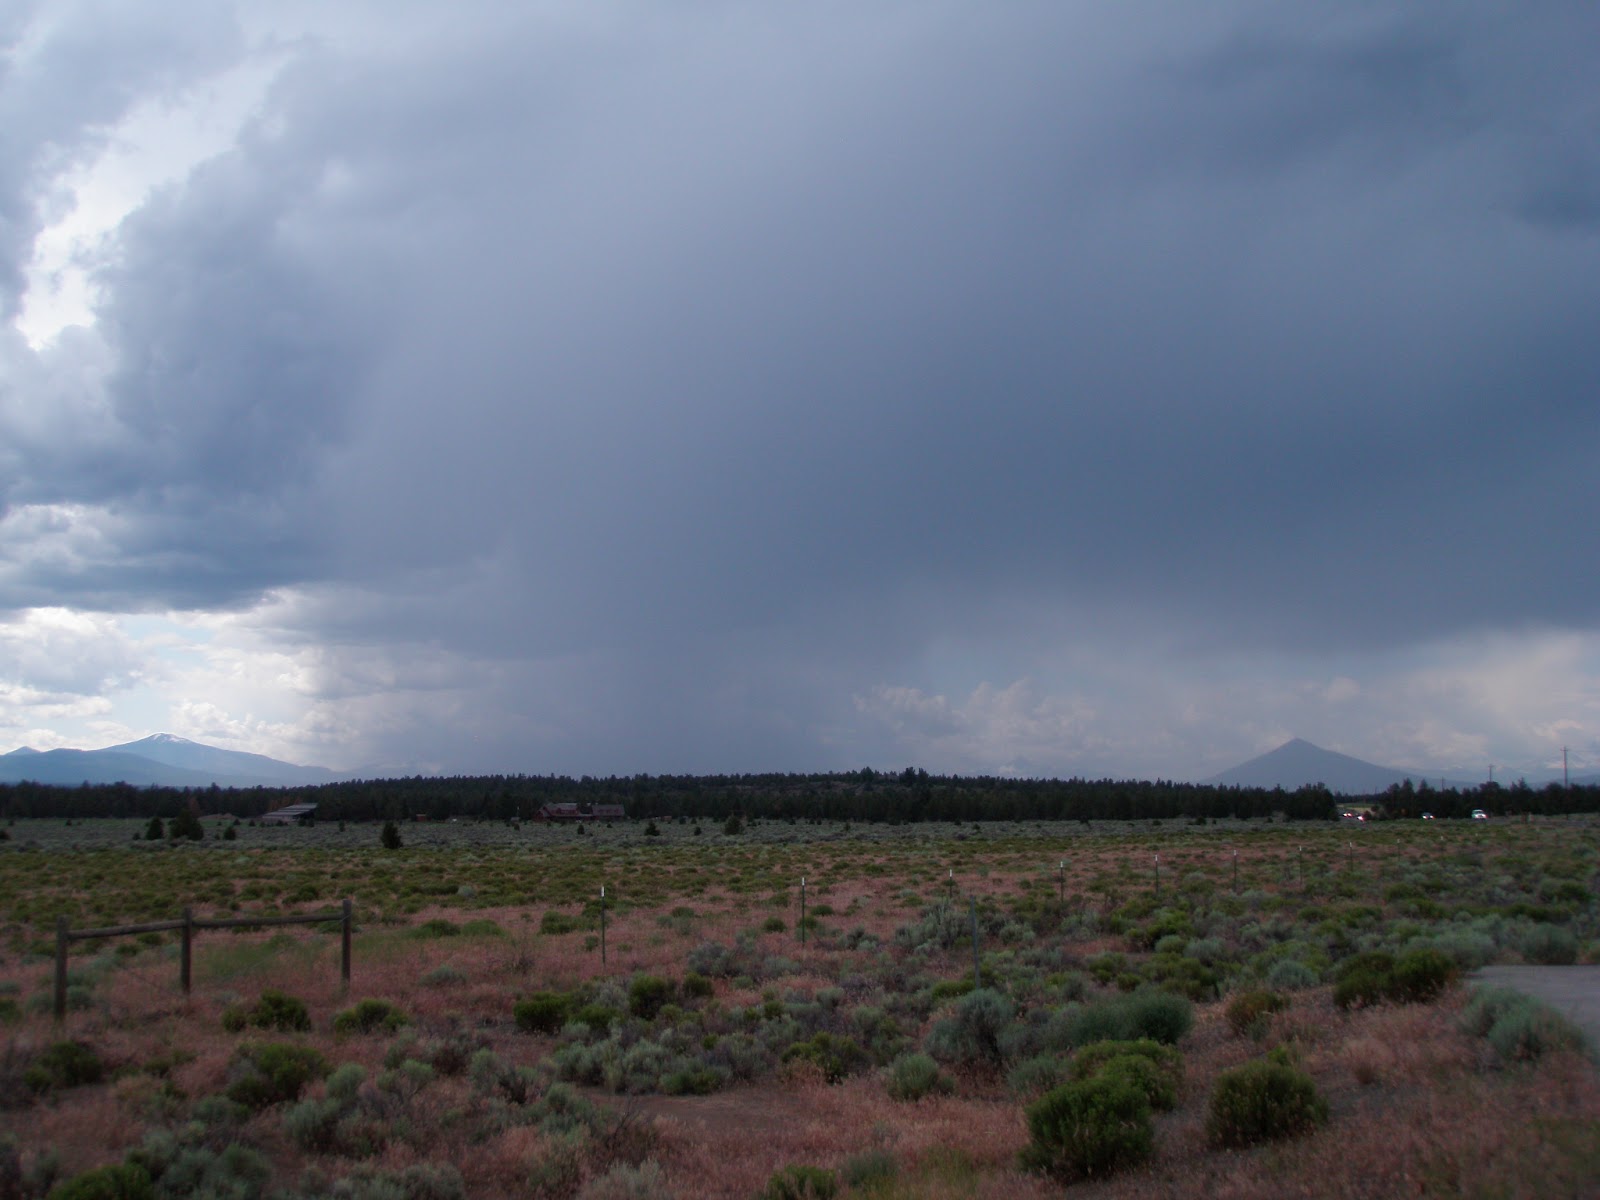
Rainstorm moving across the high desert.


Lisa took these final 2 photos while driving 
from Sisters to Bend, after the show. 

I'm so proud of our group!  These quilts all originated from the fabric swatches we created and exchanged earlier this year, based on the color palette of the 2012 Sisters Outdoor Quilt Show poster by Kathy Deggendorfer.  We each started with the same group of 9" fabric swatches and finished with these unique art quilts.  Where to from here?


Friday, June 22, 2012

Progress Report on our Challenge Quilts

At our June meeting earlier this week, everyone brought their challenge quilts to show.  We're all  at different stages of construction, and a few were complete, or very close to being completed.  Here's a quick peek:

Maureen adding the dancing shoes to her piece, but wait til you see what she adds at the end!
Maureen's quilt top.


 Torrie's almost finished -- she has a change she wants to implement, then it's just the quilt label to add.
Torrie's quilt.
 Deb, of course, has been finished for awhile.
Deb's finished quilt.
 Kathleen, queen of fabric collage, is trying out "confetti-style" design with this one:
Kathleen's top

Kathleen's confetti-style tree tops.
 Sorry, Erika!  I can never seem to get a good photo of your quilt!  It's either out of focus, half-shaded, or something else, so I'm showing three shots of your piece, which is almost finished:
Erika's quilt.

Top of Erika's quilt, showing metal wire embellishment, followed by a row of gems.

Side of Erika's quilt with beautiful double-needle machine quilting.
 Lisa's quilt features a giant 9-patch.  The colored blocks are made entirely from the fabric swatches we exchanged, and the four white blocks are pieced to perfection!
Lisa's 9-patch perfection.
And Maya showed us the very elegant sample she made to work out her design plan.  Now she has to remake it to measure 36" x 36!  Everyone ooh'ed and ahh'ed at her creative approach:
Maya's sample web design.
I see that I forgot to get a shot of Chris' quilt. There's an earlier shot in the previous post, and since then, she's hand-appliqued the large autumn leaves to the background, threadpainted the leaf veins, and added scrumptious white velvet.  Wow-wee!

As for mine, it's still under construction and last night I started the sunset section over.  I had too much trouble piecing the extreme curves I'd designed (and I said I wanted a challenge!), so I got out my Setacolor paints and painted the sunset portion.  Now to catch up . . . two weeks and a day til the deadline!


Wednesday, May 30, 2012

Progress of members' challenge quilts

Here are the photos of other members' challenge quilts at our May 21st meeting:

Chris finished piecing her quilt top, and began hand-appliqueing the leaves.
It will be gorgeous when the rest of the leaves are applied!
Erika's quilt on the design wall.
 Apologies for the blurriness of these photos.  We were fast losing sunlight and trying to compensate by turning on all the lamps and overhead lights . . .
Top of Erika's quilt.  The row of single squares shows
all 12 surface-designed fabric swatches from our exchange.
Bottom of Erika's quilt.
Maureen's music-inspired piece also showcases
our 12 fabric swatches (center, bottom).
We didn't get to see everyone's work-in-progress, as some members were traveling and others' quilts were still at their homes, pinned to design boards or in too many pieces to transport to the meeting.  As usual, I seem to have made the least progress!  I can never seem to get cookin' until a deadline is looming too close for comfort.  And even then, I'm still changing my mind . . .
My painted and thread-painted bubble trees, where
the resist failed to hold back the paint!
Technique:   Working with a resist* in a small plastic bottle with a thin metal applicator tip, I outlined the areas that would become tree trunks, branches, the half-circle shaped "bubble," as well as the edge of the grass line.  (* I used Presist, a water-soluble resist that works on cotton fabrics.)  Once the resist was thoroughly dry,  I sprayed a light mist of water on the grassy area before painting it with diluted Setacolor paint, knowing that would help the paint blend.  I should have remembered to suspend the fabric onto stretcher bars (as in silk painting), and because I didn't, the wet fabric clung to my plastic-covered painting surface and the green paint migrated above the resist lines of the grass.  Elsewhere, I painted on dry areas and the paint stayed within the lines (except for a bit on the far left).  Once the paint was dry and heat-set, I rinsed out the Presist, then began thread-painting, a technique I love.
This was a fun experiment, though not 100% successful.    I overdid it on the smallest tree on the right. Earlier, when applying the Presist there, I had problems getting it to flow in a  smooth, thin line.  The resulting blobs meant that after rinsing out the Presist, the white areas to be thread-painted were much wider than in the other two trees.
And after this experiment, I realized that the scale of the trees was all wrong.  So it's back to the drawing board.